Popular search
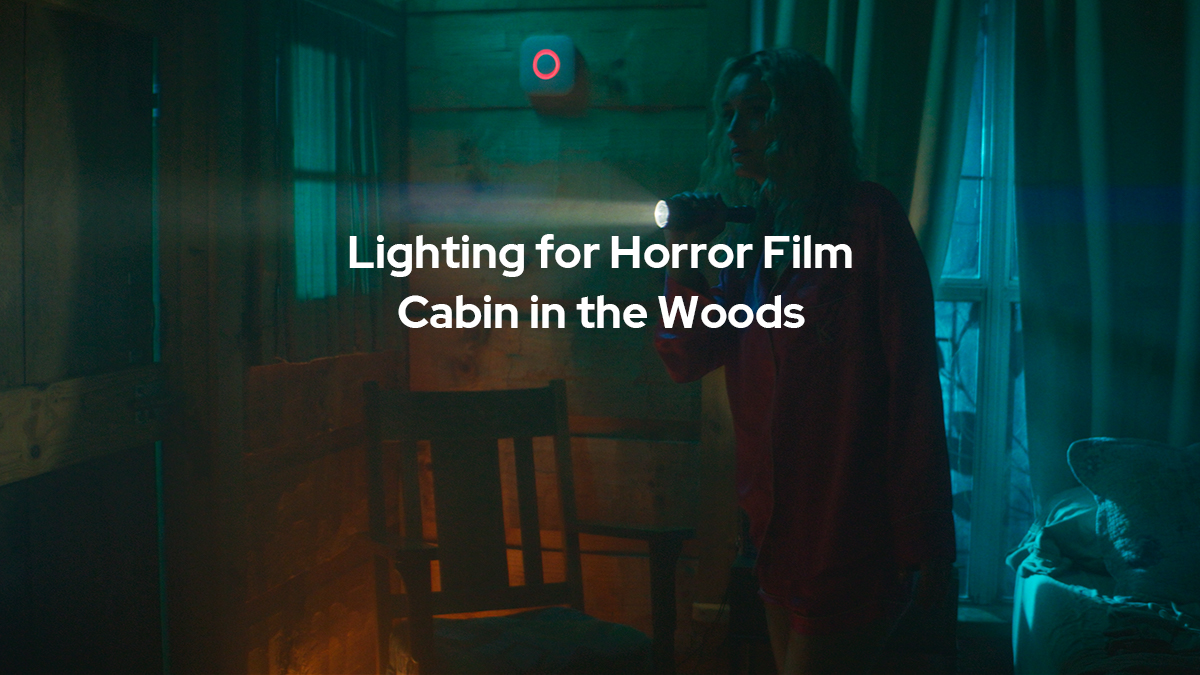
In this episode, Jameson creates a scene inspired by the popular "cabin in the woods" look that has been a proven setting for many iconic horror and thriller films throughout the past few decades. We've all seen horror films when the main character goes against any logic, and finds themselves trapped in a situation that they cannot escape. As an audience, we're always saying "No! Don't do it! Get out of there!" But of course, the inevitable always happens. That being said, Jameson will show how to use different lighting techniques using Godox lights to help transform an average cabin into a location with added suspense and haunted horror film vibes.
Background
Welcome to Godox film lighting 101. For this episode, we'll be creating that tried and true "cabin in the woods" type thriller vibe. Let's check it out.
For this setup, we wanted to create a scene that has been the setting for a ton of thriller and horror films over the last few decades. We've all seen horror films where the main character goes against any logic and finds themselves trapped in a situation they cannot escape. As an audience, we're always saying "No! Don't go there! Don't do that! No! The killer is right there!" But the inevitable always happens, that being said we're going to use Godox lights to create added suspense within our haunted cabin scene.

The Location
What was nice about this location was that the walls had this wooden texture all over the place, which really helps add just more detail to our overall scene.

And there were lots of props and things to choose from, which really helped us achieve the "cabin in the woods" type look that we were going for.

Camera Setup
So for this scene, we're shooting on the red komodo with a 28 millimeter basin anamorphic 1.8 lens. This setup is really cool because it's lightweight and still looks like a movie.

We have it attached to a gimbal, and we have a ring around the gimbal. This is just easy for me to hold. And I've actually added a ready rig to really support the weight of the camera and the gimbal, so that way I don't kill my arms or my shoulder.

When shooting anamorphic, your close focus distance is usually three to four feet, which isn't really that great. So you can add a diopter which goes on the front of the lens. That actually allows you to move closer to your subject, allowing you to shoot a close-up. I've added different kinds of diopters, depending on how close up I am and how close I want to be to my subject.

On top of that, I've added a black pro-mist filter, which helps add atmosphere to the shot into the lens, and helps just give the overall skin tone slight diffusion.

Lighting Setup
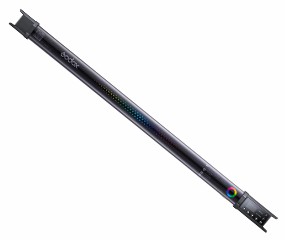
When it came to establishing moonlight for our exterior, we wanted to actually pick a different kind of vibe. So we wanted to go with more of a turquoise type tone, so we took an LD150R panel light. It is illuminating the two smaller windows on the side of the cabin. And we have this light intensity at 100, the saturation at 100, and the hue at 195 degrees.

That's really giving us this cool bluish-green tint, which I think kind of looks cool it looks a little post-apocalyptic, which is the vibe that we wanted to go for.

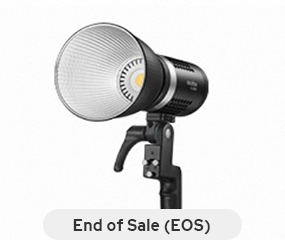
We really wanted to create some hard light as our moonlight that's coming in through the back window of our scene. So we use the Knowled M600D. This light is quite the workhorse. It is super
Bright, super efficient, and it's actually very good for run and gun, because it can be battery powered. Not only that but you can actually dial in exactly the settings that you need by small increments. So you can really get that light exactly where you need it.

So attached to the M600D, we have the FLS10 fresnel. This is great because it intensifies the light itself by about four times. So the fresnel actually allows you to either make it a flood or a spotlight. We have this dialed into the spotlight setting. Then that way it casts hard beams through the window in our scene.

And attached to the fresnel, we've added a blue and a green gel. That is giving us the same color tone that's coming from our other panel lights on the other side of the building. That way all the exterior lights are matching each other.

This light coming in through this window right here is the Knowled M600D with the fresnel. It's casting this harsh light. Once we added haze to the scene, it created those really cool beams. And another thing to consider is when you're filming through a window, especially at night, we actually took a water bottle, and we wet down the window, just to create some extra texture. So that that way the light casting through your window has a little bit more detail to work with.


To illuminate the bathroom windows where the killer was hiding, we used an LD150Rs. And we controlled the hue to the exact same color temperature that we did on the opposite one. So all of our lights are universally about the same color tone. And that just kind of replicates the idea that moonlight is surrounding our entire cabin. So we have the LD150Rs outside casting this turquoise light onto this really cool glass.

I really like this glass panel just because you can't really see what's outside, and it was a perfect place for our killer to hide.


To really create even more of an atmosphere within our scene, we wanted to make it seem like there's a thunderstorm happening outside. So we took a couple of these Godox ML30Bi lights. And we put it on the lightning effect, and we set them right outside the window at an intensity of 70.

That's casting a really cool flashing light on our subject in the environment inside, which helps add more drama to the scene. So the lightning effect is actually coming through here, and that's from the ML30Bi lights. That's right outside the window and they call these the dainty lights but they're actually really bright and really powerful. And the lightning effect worked perfectly for us in this particular scene.


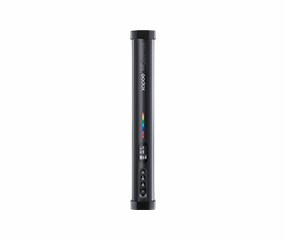
Now that our moonlight is set, and all of our exterior lights are set up. We wanted to come inside and we wanted to actually give the interior a little bit of color contrast. So we picked a complementary tone to the turquoise lights that are happening outside. And we picked some Godox TL60 tube lights.

We took three of these and placed them in each corner of the room like so. This is actually helping illuminate that texture on the wooden paneling on the wall. This one we actually placed right down here behind that chair right there. And then another one we have in this corner over here. So we set the kelvin to 2700k just because it has this really cool yellow-orange tint. And it complemented the turquoise light outside very nicely.

Once we placed all of the 2700k TL60 lights on the ground and across the room, we realized we still needed more moonlight. So we took another TL60. We gaff taped it way up high up here, and I took the Godox Light App. I'm able to control the hue to match exactly the moonlight that we're using outside. So that just allows a little bit more illumination on our subject's face, just to highlight her even more. So using the Godox Light App is really handy in situations like this. When you have a light placed really high, I can just use my phone and the app to control the intensity of the light, and dial in the exact color that I need.

Our subject was moving throughout the scene, so we used a Godox TL30 as just an additional fill light. And this moved along with me, as I was traveling backward, as she moved throughout the scene. It just helped illuminate her just a little bit more so that she wasn't too dark within the environment.

Finishing Touches
As far as our environment goes inside with our set decoration, we added this really cool vintage lamp, just because we really like the look of that. To hide our lights outside, we added these window shears to this big window right here, and also this more of a transparent see-through sheer, to allow our lightning effect to still illuminate through along with our panel lights that are casting that turquoise light. Because this cabin is so small, we use some aerosol spray to give it atmosphere. And once we spray it, it'll really give us those beams to really make the scene come to life.

Hopefully you can use a few of these lighting techniques to help add some extra drama to your thriller or horror scene.