Popular search
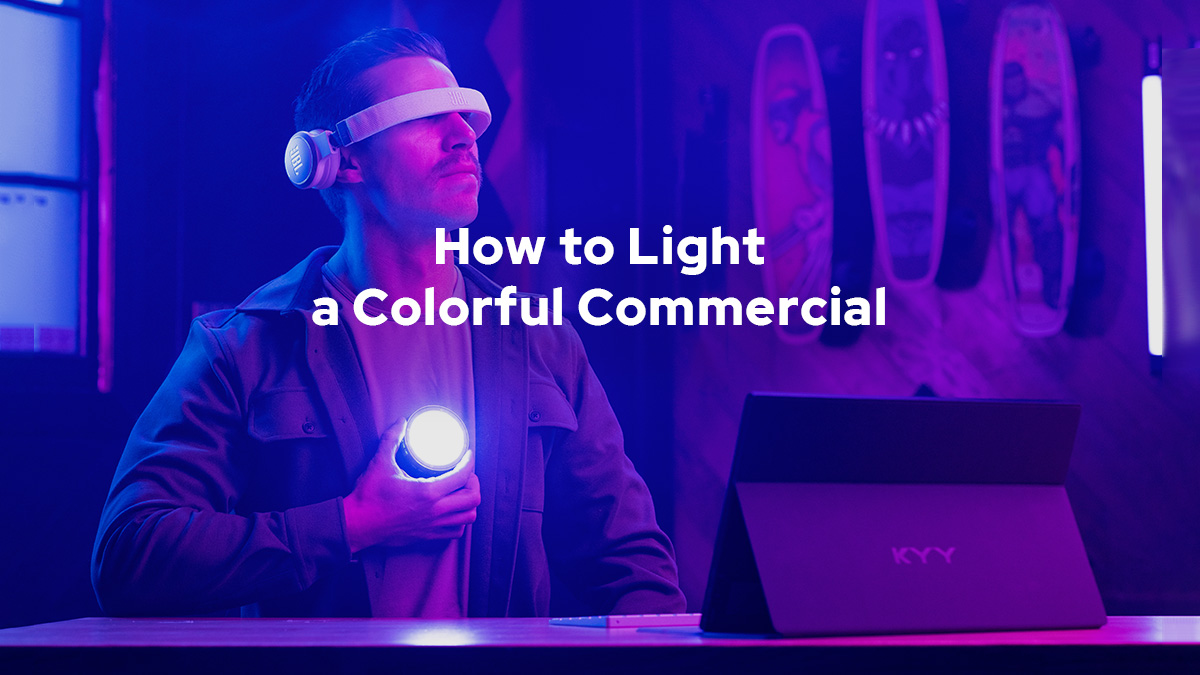
My name is Austen Paul. I'm a professional filmmaker who's worked with companies all over the world creating high-end commercials with small teams in affordable gear. Today I'm going to show you guys how to light a colorful commercial where you can take your shots from this to this in a matter of minutes.


Preparation
First we need to pick our location. I'm going to be using my studio today. Because this is the easiest access, and it's a free and perfect place to start. Choose something that's free, simple, and easy for you to access. This will be a great challenge for you to push your skills in lighting and as a filmmaker.

When creating a certain look for my commercial, I like to break down the process into steps. One, lighting the subject.

Two, lighting the scene.

And three, set design.

Before we start to light, we need to figure out the look and style of our commercial, I'm going to be emulating one of my favorite films Blade Runner 2049.

There's a lot that goes into lighting, but we're just gonna break this up into simple sections. I always start with my subject first, as that's the most important thing in my entire scene. Typically, there are three lights that are going to be lighting our subject. We have our key light, which is our main source of light on our subject. Then we have our fill light or negative fill. And then lastly we have a rim hair or backlight. That's illuminating in the back and separating us from our subject.
Key Light
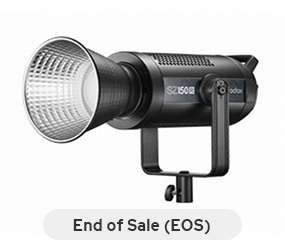
So the first light that we need to bring in is our key light. What I'm going to use is the Godox SZ150R, because this light is small and powerful. We can put a modifier on it, and it's going to give us a lot of color. So this is a perfect light for creating for our key light, especially for a colorful commercial like this.

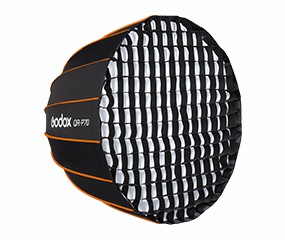
We can go from regular white balance to a really colorful look in a matter of seconds. Now I'm building my first modifier for my key light. This is the QR-P90 modifier. This is going to give us a beautifully soft light. So I'm parting it in the first layer right now by just attaching it like this. Then we're going to put on the second layer, which is going to give us again that soft light. And then we're going to set it up and we're going to position it for our subject. As you can see we're getting color onto our light stand. If I stood in there you can see color on me.

Where we're going to be placing this light? It's always a good rule of thumb to start out with a simple lighting setup. And a simple lighting setup that looks really good, and we might change it is the Rembrandt look. The Rembrandt look is going to be at an angle that's higher than the person pointing down a little bit and then about three quarters on one side of their face. Because it's going to create from the shadow of the nose, a triangle of light on the other side, the fill side of their face.

This is just a generally good lighting setup. So to do that, what this light stand is, we're just going to bring it up right here. We already have it pretty much there, and then I can kind of stand in just to show you guys what that looks like. But this gives you kind of an idea, as the color starts to change onto my face.

Rim Light
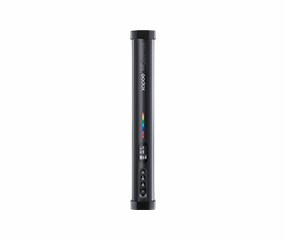
For this tutorial, I'm going to mix it up and place my rim light next. The importance of this Rim light is because this is going to separate our background, so our subject, me, doesn't get blended in with the background behind us. For my rim light, I'm using the TL30 tube light by godox. This light is small and powerful, and it's so easy to place anywhere you need it, and this makes it perfect to use as a rim light.

What we're going to do is we're just going to attach the light right here, and we're going to attach the other light right here of the two tube lights. This is going to create a perfect Rim light on the back, which is going to be awesome and very cool. I'm just going to put right here, because it's magnetized which is really cool right. So now as you can see with me standing in here, you can see the red as a rim, and then you can see our key light right here. It's going to be a lot more prominent once we turn off our studio lights. We're just using the studio lights so you can see everything as we build our setup.

Fill Light
The next light or board is going to be our fill light. You don't always have to use a light on your fill side. You can actually bring in a bounce board, or even a negative fill to make it even darker and block out light. It really depends on the look you're going for. For our fill side, we're going to be using this bounce board right here. This is just insulation board at a hardware store that goes in between the walls of your house. There's a silver side and a white side, which is perfect. Then I just cut it out to the sizes that I want, and then gaff tape it, to have it how I want it.

But I'm going to attach it right here, and then we're going to angle it similar to the light. And we're just going to raise this up, and that should cover a good portion of my face. Now I haven't started dialing in the lights at all yet. And we can definitely get this closer that as you can see now. there's a lot more light on the fill side of my face.

I've turned off the other lights, so you guys can see the color a little bit better for right now. And this is with the fill in and then I'm going to remove the fill now. Then you can see a difference in the shot without the fill or the fill there.


Remember, you're going to fail. I fail all the time when setting on my lights. It's just all about practice, and tweaking, and readjusting. If you don't like the look, start by turning off your lights, and then starting all over with your key light, and then building from there again. You can even go through the Godox app, and start to adjust the Hues and the brightness, and be looking at it through your camera. Because that's the most important place to be adjusting your lights.
Ambient Light
Now that we have our subject lighting roughly dialed in. It's now time to light our scene or our space. First light I like to start with is my ambient light. An ambient light is just a light that's going to bring up the overall brightness of the room. Another great light, which is the light that we're
using for the key light is the SZ150R, because this is going to be the most versatile light. Very lightweight. It can have us either go to regular white balance, or to color. But we're going to use it for color for this, because again, this is a colorful commercial.

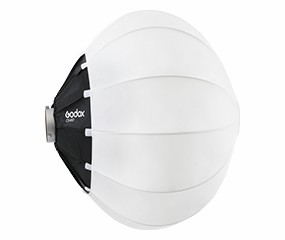
One of my favorite modifiers to really bring up the ambient light in a room is the CS-85D. It is a nice Lantern. As you can see, it's a diffusion that's going to evenly spread out in 360 degrees. So this is perfect for bringing up that ambient light.

Now that we have the subject lights in the ambient light setup. Let's jump over to the camera, and start playing around with our Hues, just to recap. Right now I have my key light, my fill light for my subject, and then my ambient light for the room, all set up. I don't have them on RGB yet, but now I'm gonna sit down, or have Alex sit down. And we're going to get our RGB look and get our Framing. Then from there, we'll build the rest of our lights for set design.
So what I'm doing is I have my Canon R5 on an 85 millimeter. And I like my framing. I like to have rule of thirds. So I have Alex just kind of sitting to the side. I'm gonna have Alex scoot a little bit more. The reason why I have this is because if I have them too far in the center, the light that we're eventually going to be putting into the scene would be right behind his head, and we don't want that. But now I'm going to use the Godox App, and I'm going to start changing the different colors of the lights. So I can get what I like.
But before I do that, I'm just going to turn off this light. So we can see this whole process of our scene starting to become something really cool. I just have Alex sitting on the left side. Rule of thirds. I also have the darker side of the fill closer to the camera, as I am looking over there. As you can see, it's darker on his face right there on his cheek.

And the importance of that is you show the dark side. It's going to create more depth to make your shots look more cinematic. But first we're going to start with our key light. And what I want to do for this look is I want Alex to be pink. I know that sounds weird. But we're just going to go from CCT, and we're going to go all the way to HSI.

And right there, I'm already kind of liking that. But we have to start playing with the other lights to get a better idea. If we're gonna have Alex pink, I need some contrast. and what is a great contrast for pink is light blue. So now we're gonna have our fill lights on Alex blue. So I'm going to go over to those. We're gonna go to the first one, and we got it blue. So now you can see all the color coming together. We're gonna do the next one. That's looking great.

So now the next is our ambient light. And from there, once I do my ambient light, I can see what else I need to play around with. We're going to go to our globe light or our ambient light. We're going to go over to HSI, and let's play around with that. And I want to make that blue and we're just going to keep going blue like that. Look at that, we already have a really cool Blade Runner look. And we've barely done anything from there.

Light motivation
I like to look at light motivation, impractical lights. I like to ask myself, looking in the scene, where would lights naturally come from? Would it come from a window, from the Sun, or maybe even a light that's off camera? Those are going to be my motivational lights. I'm on HSI for the tube light. and I have it at 290 on the Hue, and we have its saturation 100. We're just going to stick it right in here with some gaff tape, that I put right here. And we're gonna go like this, and just hide it right here now. That's one way of doing it obviously. If I wanted more color coming off of it, I could have put it up there with a C-stand, and pointed it down like that.

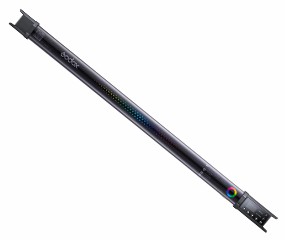
For my practical lights, those are lights that are going to be shown on camera that you can see. I have two tube lights, the TL60 right on the back wall that are right next to my skateboards. The TL60 tube lights by Godox are perfect lights to use as my practical lights. They're beautiful in the scene. And they are RGB capable, so I can use them to use great color contrast in my scene in the background, and also highlight the skateboards.

I just feel like it's going to be too blue. I want these boards right here to be pink. So what I've done is I've mounted another tube light right here to a C-stand. We're just gonna roll it in like so. Lift it up, make sure it's not in the shot, and we're just going to have that aimed right at the skateboards.

Now Alex is sitting back down. And look how much big of a difference those lights just adding them into the background makes. Now we have Alex really popping out.


Set Design
Lastly, I'll be focusing on my set design. And from there, I'm just looking at the motivation of what my actor is doing. If he is sitting at a desk, he's probably writing or typing on his computer. So I'll place a computer in the scene, and then put a little bit of decoration. You can keep the set design simple. It's going to make a world of difference when shooting your scene.

Right now that's looking great. I think we can add a little bit more in with a few more lights just for fun. So let's do it now. Just to add a little bit of motivation to this monitor, I'm going to be using a Godox round mini magnetic light. These are super cool and just small, compact, RGB as well. So it's easy to place them anywhere I want. These lights are perfect for making sure that you can just have motivative lights that can hide behind something, that's small. So I'm just going to turn this on and now have it pink. So it's just going to add a little bit more. I'm not going to point it directly at Alex. We can have them play around with it, but I'm just going to place it right here. So it kind of bounces off the screen, and you're just lighting up his face a little bit more.

Next, I'm going to take one more, and I'm going to have this one actually a little bit different. This is just going to punch in a little bit on Alex's face and we're just going to come on over here. I'm going to turn it. I'm gonna have it more of an orange look, and it's just going to highlight the headphones when Alex puts them on. So it's gonna be perfect for our shot.

Now I have Alex just sitting there. This looks so good. I'm so stoked with the look of it. We have an 85-millimeter 10 R5, and then I just have it at a 3.5 and I think we are getting the look that we want with Alex. So I think this is amazing. This is what I would do for my setup shot.
Lighting can really be simple, and really up level your work and make a world of difference from taking it like something boring like this, to something that looks amazing like this.


Remember it takes time and a lot of failing. I cannot stress this enough. I really hope you guys enjoyed this tutorial, I want to give a huge shout-out to Godox and their team for providing these lights. Without the build quality and amazing versatility of these lights, this scene would not be possible. So again use the right lights to create awesome scenes these are affordable high quality and perfect for everyday use.