Popular search
Good day, guys! Your mate Aries Tao here, welcome to Godox Lighting 101. The discussion about AI has been going on for months after a midjourney 5 was published. So today, rather than doing lighting on location, I use AI to create a couple of backgrounds. Then, we are going to use the light to mimic the real-world lighting for the composition. And here we go.

Studio Lighting Setups
AI can be applied in so many fields. The way I use it is to say that there are some places we want to go, but we cannot go. So, I decided to design a fashion campaign at Grand Canyon with AI and then do my shooting in the studio and compose it.
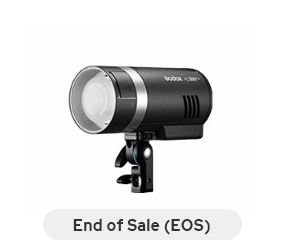
Let's talk about the lighting. There are two AD300PROs with a 165 cm diffusion umbrella at the back for fill lights. The reason I used two is so I can stand in between, ensuring that the lights wouldn't cast any shadows over the models.


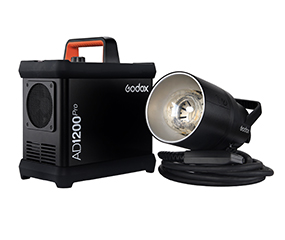
There's also an AD1200PRO bouncing off the ceiling to have some skylights over her body.


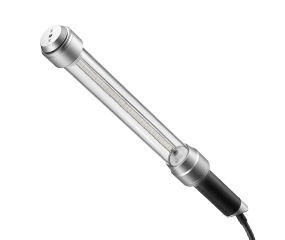
There is an AD-S200 to mimic the sun, casting on the model's shoulder to mimic the midday harsh sunlight. I added a 1/4 CTO gel to cast yellowishness on her shoulder to mimic the warmer sun temperature.


And then, this is optional: I added another AD300PRO to mimic the reflector, bouncing some lights back around her face. And here we go.


Tips for Consistent Lighting
When you generate your image in an AI program like me in Midjourney, just make sure you generate a series of images with consistent lighting, sort of scenario, so that you don't have to change your lights every time between different shots.
Like me, I generated a series of images at midday in Grand Canyon or in the desert, right? The sun is pretty much up and high there, slightly backward, to kiss on the models here and sometimes spill on her shoulder and purposely on her chest. In the real world, midday is gonna be challenging, but in the studio, I can control how strong the big sun is, so that actually helps.


And you see, I don't really change my lights much once I set it up. This is something you need to take into consideration beforehand: a series of images with consistent lighting scenarios. In my case, midday sun a bit behind the model.


Another thing is, in the real world, the floor is not always flat. You can see in this image her feet will be standing up; the heel in this scenario, an apple box works like a charm, so she can put one foot on the apple box and another foot on the floor to mimic she's standing on the uphill.


Tips for Composition
Couple of tips if you want to do the composition. So, watch out for the lighting, which is most important, right? Where the highlights go, where the shadow goes. So, try to mimic the same lighting scenario.
So, the number one thing you need to watch out is the lighting direction—obviously, where the sun goes: is it up high or is it on the side? Number two will be the color of the light. Is it warm in the highlights in the sun and a bit cool in the shadow? Using color gels to mimic the sun and to mimic the bounce lights. Usually, fill lights I just have no color gels, but sometimes, to mimic the light bounce of the sand, I will use some CTO gels because the sand is yellow, right?
After that, just watch out for the lighting ratio: how bright the highlight is and how deep the shadow is. The more work you spend on your lighting, you will save tons of time in your post-production.


Let me know what other topics you want me to do in the next episode. This is your mate Aries Tao; I will see you in the next episode.