Popular search
#Cinematic #footage look
Cinematic atmosphere is always require a lot of equipment to create, cause it needs to be accurate and artistic. Many filmmakers feel it is challenging with limited budget.
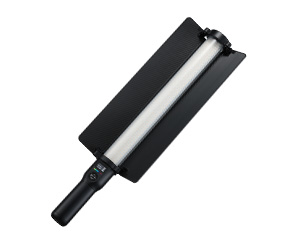
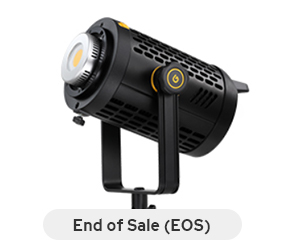
Freelance filmmaker Simon Cade did a fun little lighting tutorial using the Godox powerful, fanless UL150 lights and the RGB Lightstick LC500R to show hot he balance the budget and the film art.
Keylight and backlight set up
I’m Simon Cade, I’m a freelance filmmaker and the host of the YouTube channel DSLRguide. Now one of the first lighting techniques that it seems like everybody learns is three-point lighting, where we set up three individual light sources to fully illuminate a scene.
We’ll use the Godox UL150 on a light stand, powered by an industry-standard v-lock battery. This makes it totally portable while it kicks out some serious power, so this setup is perfect for use with attachments like this softbox. You can see the difference in lighting once it has been softened: the shadows are looking very smooth.
Then we can also set up an LC500R on the opposite side as a fill light, and dim it down really low so it doesn’t overpower the key-light.

But this isn’t really to my taste, because I think it removes the beauty of those soft shadows. So let’s turn it around and increase the brightness so we can achieve a softer fill light. I think that’s looking better.

For our backlight, I’ve got another LC500R which is simply positioned on a C-stand, this kind of look might work for a TV commercial, cause we want everything to be pristine and bright. But I haven’t personally used this technique for many years, because I haven’t really seen it on the cinema screen. I’m thinking maybe it’s more of a photography technique.

If we’re pursuing a cinematic look then I’ll want to create more contrast between the actor and our background, so they stand out a little more. Firstly, let’s reposition the light so it comes more from the side. This way, the light isn’t illuminating the background so much, but it still hits our character. We can also add the grid that’s included with the softbox, which makes the light far more focused without losing any softness. We’ve got a very dramatic look, so we can choose where we want to add the light back in.

I’ll start by adding the LC500R, and I’m bouncing it off the back wall to illuminate the background. The benefit here is that it’ll also give a subtle backlight and fill light on our character. I’m being careful not to make this light too bright this time, so we can retain some of the contrast between the subject and the background.

Finally, I’ll set up one more background light with a mini-tripod stand to illuminate this area that was looking unnaturally dark. There we have two different approaches to the same shot, and let’s dive in to our next step.

The natural lighting setup and television light setup
So I always like to start by considering the real-world motivation of the light. Let's ask: what would illuminate this shot naturally?
I think this lamp in the background is a great starting point, so I’m going to set up the first light on the same side as the lamp, and adjust the colour temperature. The LC500R has a CCT mode which is really helpful in these kind of situations because you can precisely adjust the light to get different effects, and this time I’m going to use it so I can match the colour of the practical lamp, without needing to use any gels or filters. Knowing that this is a battery-powered light with CCT and RGB adjustments, I really wasn’t expecting it to be so bright, for example for this shot, I only had to set it to 16% brightness.
So the last thing to do is to adjust the barn doors until I’m happy with the shape of light. In this case, let’s narrow the light so it doesn’t spill onto the background, and take away from that really nice contrasty look that we’ve got. I really wish that every light came with barn doors. It’s honestly so much faster and simpler than trying to set up a separate piece of card or a flag to try and block the light.
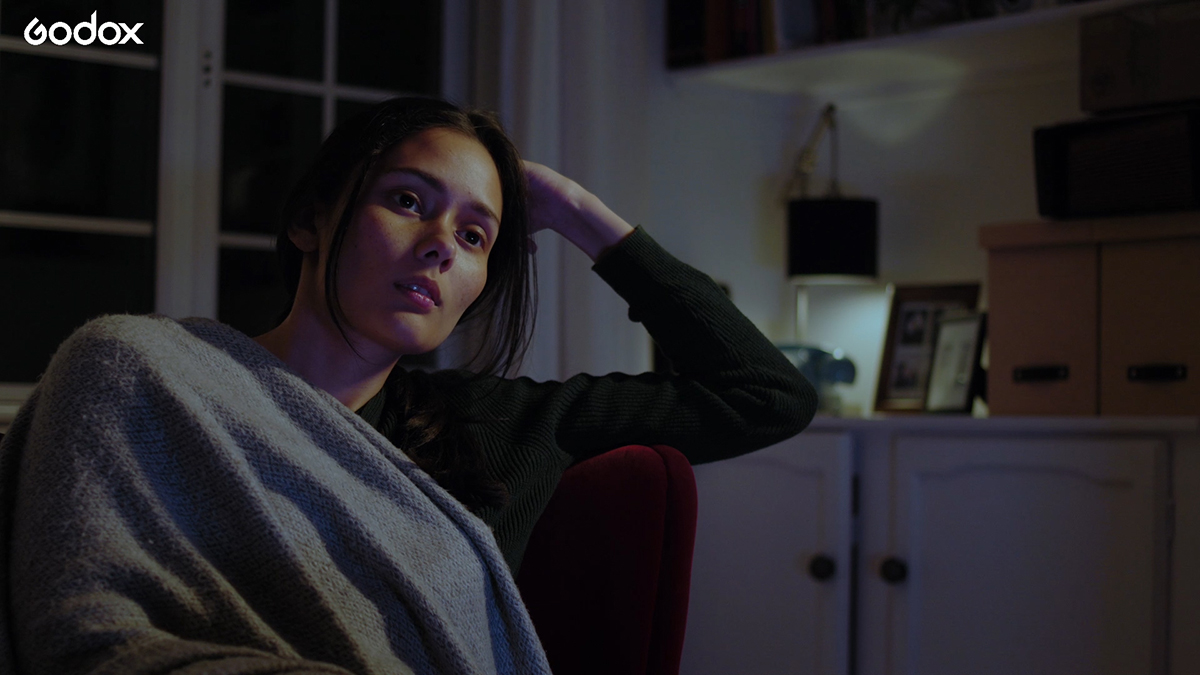
We’ve created quite a dramatic shadowy look, but that’s okay since we’re aiming for a darker evening feel, and I know that our next light is going to balance things out. Let’s place a second LC500R on this table, again without a stand since it’s already at a perfect angle to replicate the light from a TV.

So if our character is supposed to be watching TV, then we’d expect a cooler, slowly flickering light to illuminate their face. Now of course, we could do this by manually adjusting the dimmer of the light, or by blocking the light in some way with some kind of filter or gel. But fortunately, this light has a feature that will do this accurately and automatically. Television mode is one of the many FX presets, and this one simulates the random occasional brightness adjustments that we’d expect if a real TV was set up.
This kind of style could work if our story involved a character who was really engrossed with the TV, maybe they were kind of obsessed with whatever they were watching, but by adding our first light back into the scene, we create a more balanced look between the constant lighting and the TV simulation.

Police car light setup
In terms of lighting, this next shot is pretty simple. Our character sees a police car outside their window, so they take a look. Trying to find a real police car to film with comes with a lot of challenges. Not only would we need to probably spend quite a lot of money but we’d need to make sure that we don’t get in trouble for impersonating a police officer. And so there would be some kind of regulations to follow and maybe some permissions to get.
However, with the LC500R, we can avoid all of those issues since we can place the light between the window and curtains, and face it towards the wall so the light bounces back as a larger source. Then, we just jump into effects mode and choose our favourite one.
Of course this effect has its limitations, but if I really needed to see a police car in some of the shots, I could imagine renting a police car just for the smallest amount of time possible, and then I’d simply use the Godox LC500R for all of the other shots. The closeups, the reaction shots and anything else where we don’t need to see the police car in the frame. That would definitely save us money but it would also give us more control over the light, because this light is completely dimmable, and it can be positioned precisely to choose the best angle.

I do like the mystery of our character’s face being completely in the shadows with the flickers of colour. But I decided to add one more light for two reasons: Firstly, it illuminates the general surroundings, so that the curtains have that ambient light that we’d expect to see if someone was at home with the lights on. And secondly, I knew that the character was going to turn her head to talk to someone off-screen, and so, this light illuminates her face nicely during those moments. So this way we can see her eyes but we’ve still got plenty of contrast between the normality of indoors, and the dangerous crime scene outside.